Android Clash Meta Guide

Clash Meta for Android is a powerful and flexible proxy client.
Step 1: Download Clash Meta for Android
Clash Meta for Android v2.11.16 APK download link:
Download from Pcloud| Original Source Download
- Open this tutorial with your browser and click download.
- It can be viewed in the browser's download list.
- Click to install.
Step 2: Import Configuration Profile
- Copy the Clash subscription link.
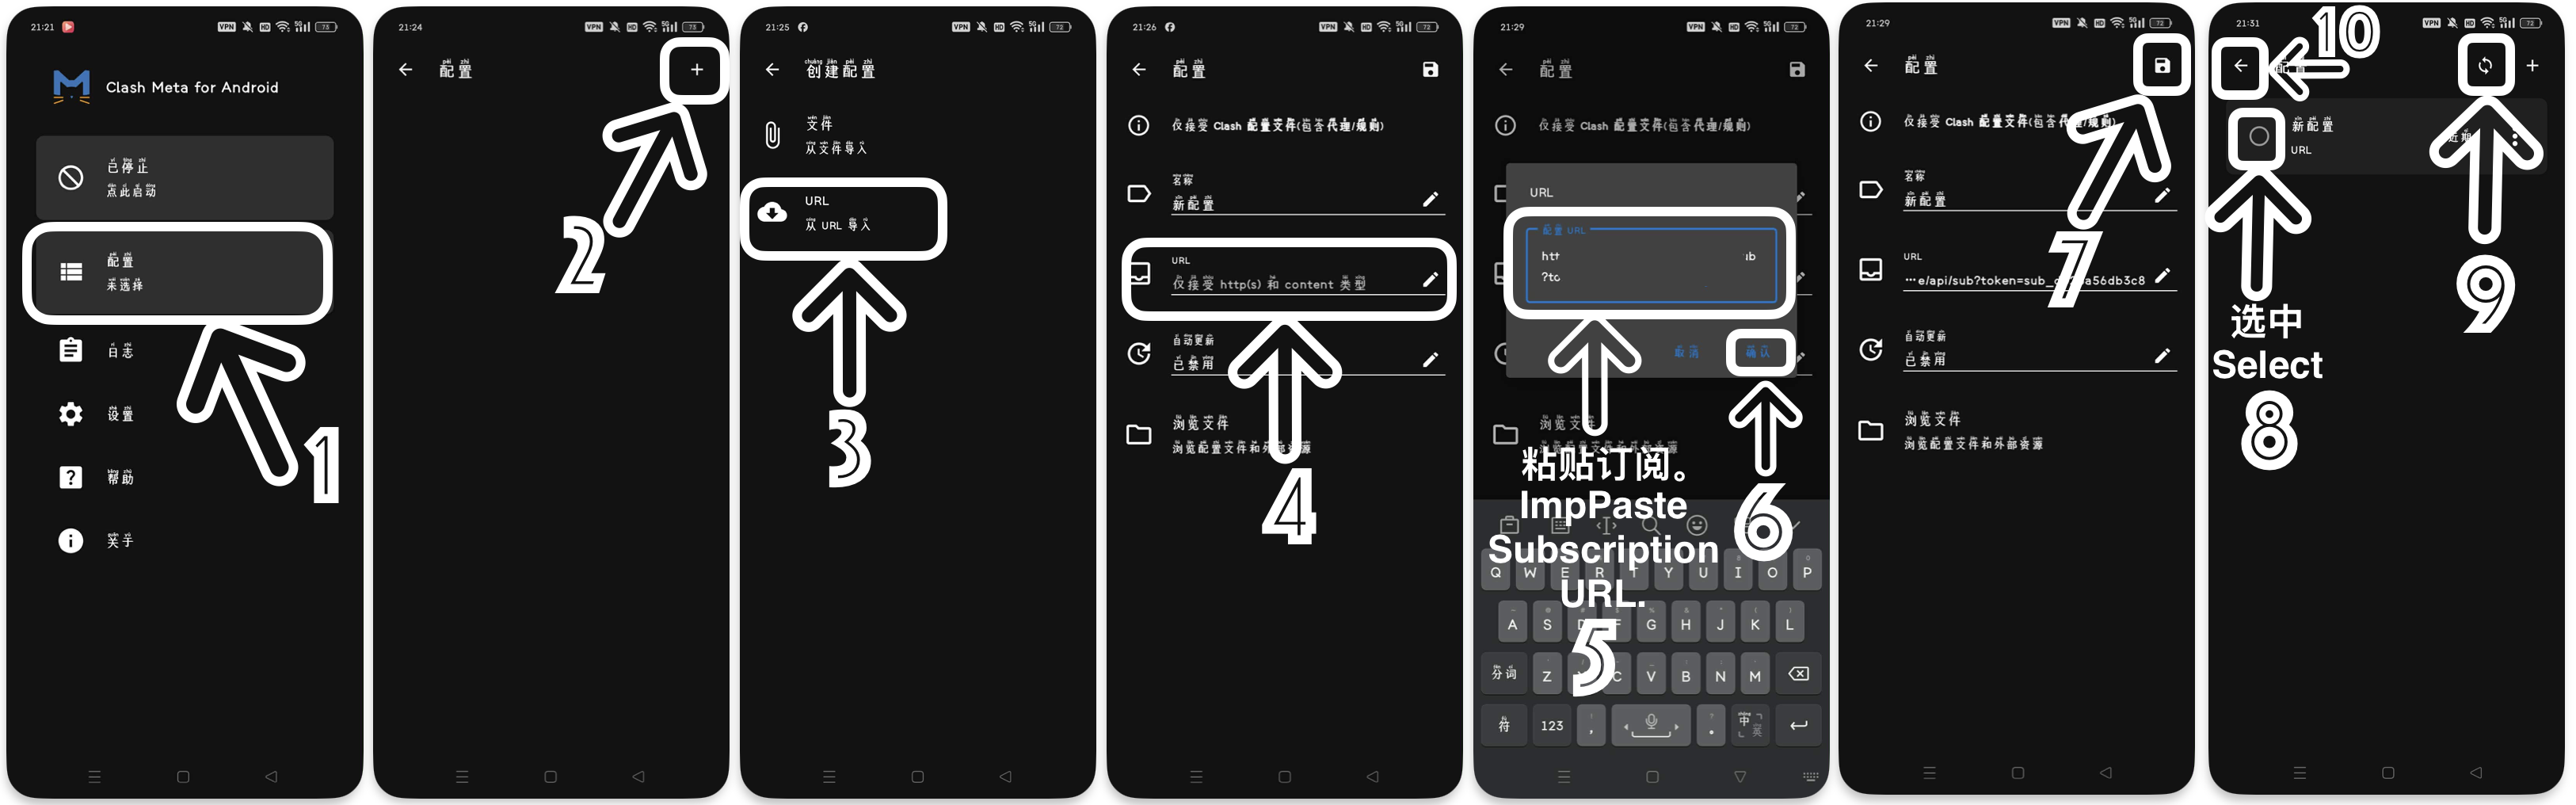
- In Clash Meta for Android, click Profiles. (Image 1)
- Click the + (New Profile) button, and select URL. (Images 2, 3)
- Enter a name (e.g., "Main"), paste the subscription URL, and click Confirm. (Images 4, 5, 6)
- Click the disk icon in the top right corner (Save). (Image 7)
- After importing, click it to select, then click refresh. (Images 8, 9)
- Return to the main interface. (Image 10)
Step 3: Select Proxy
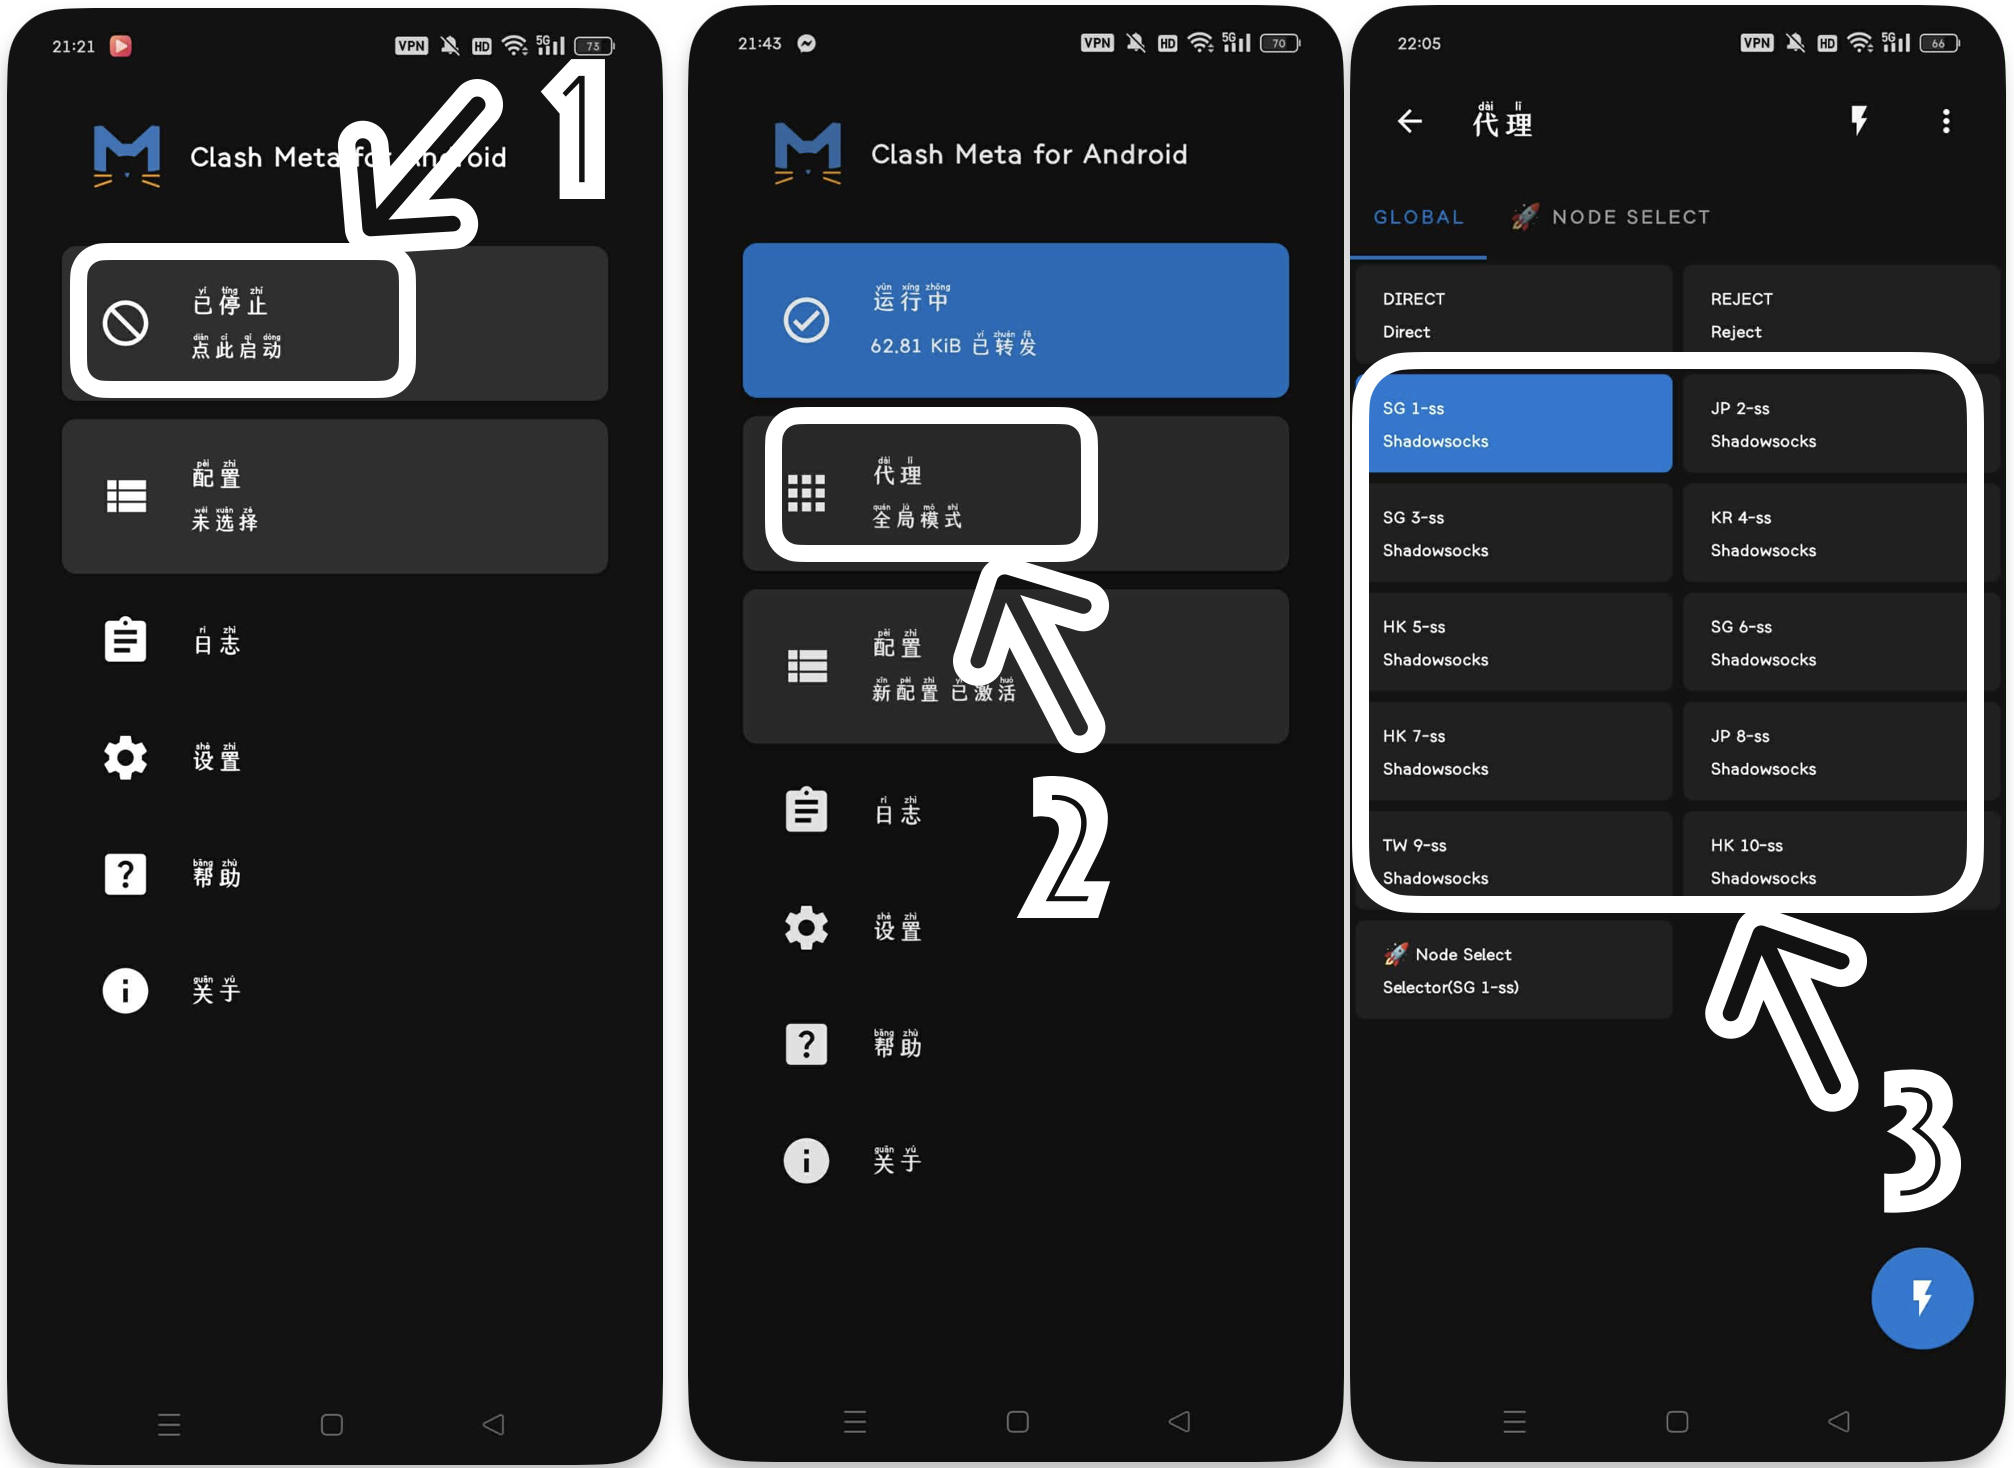
- Return to the main interface, click Start.
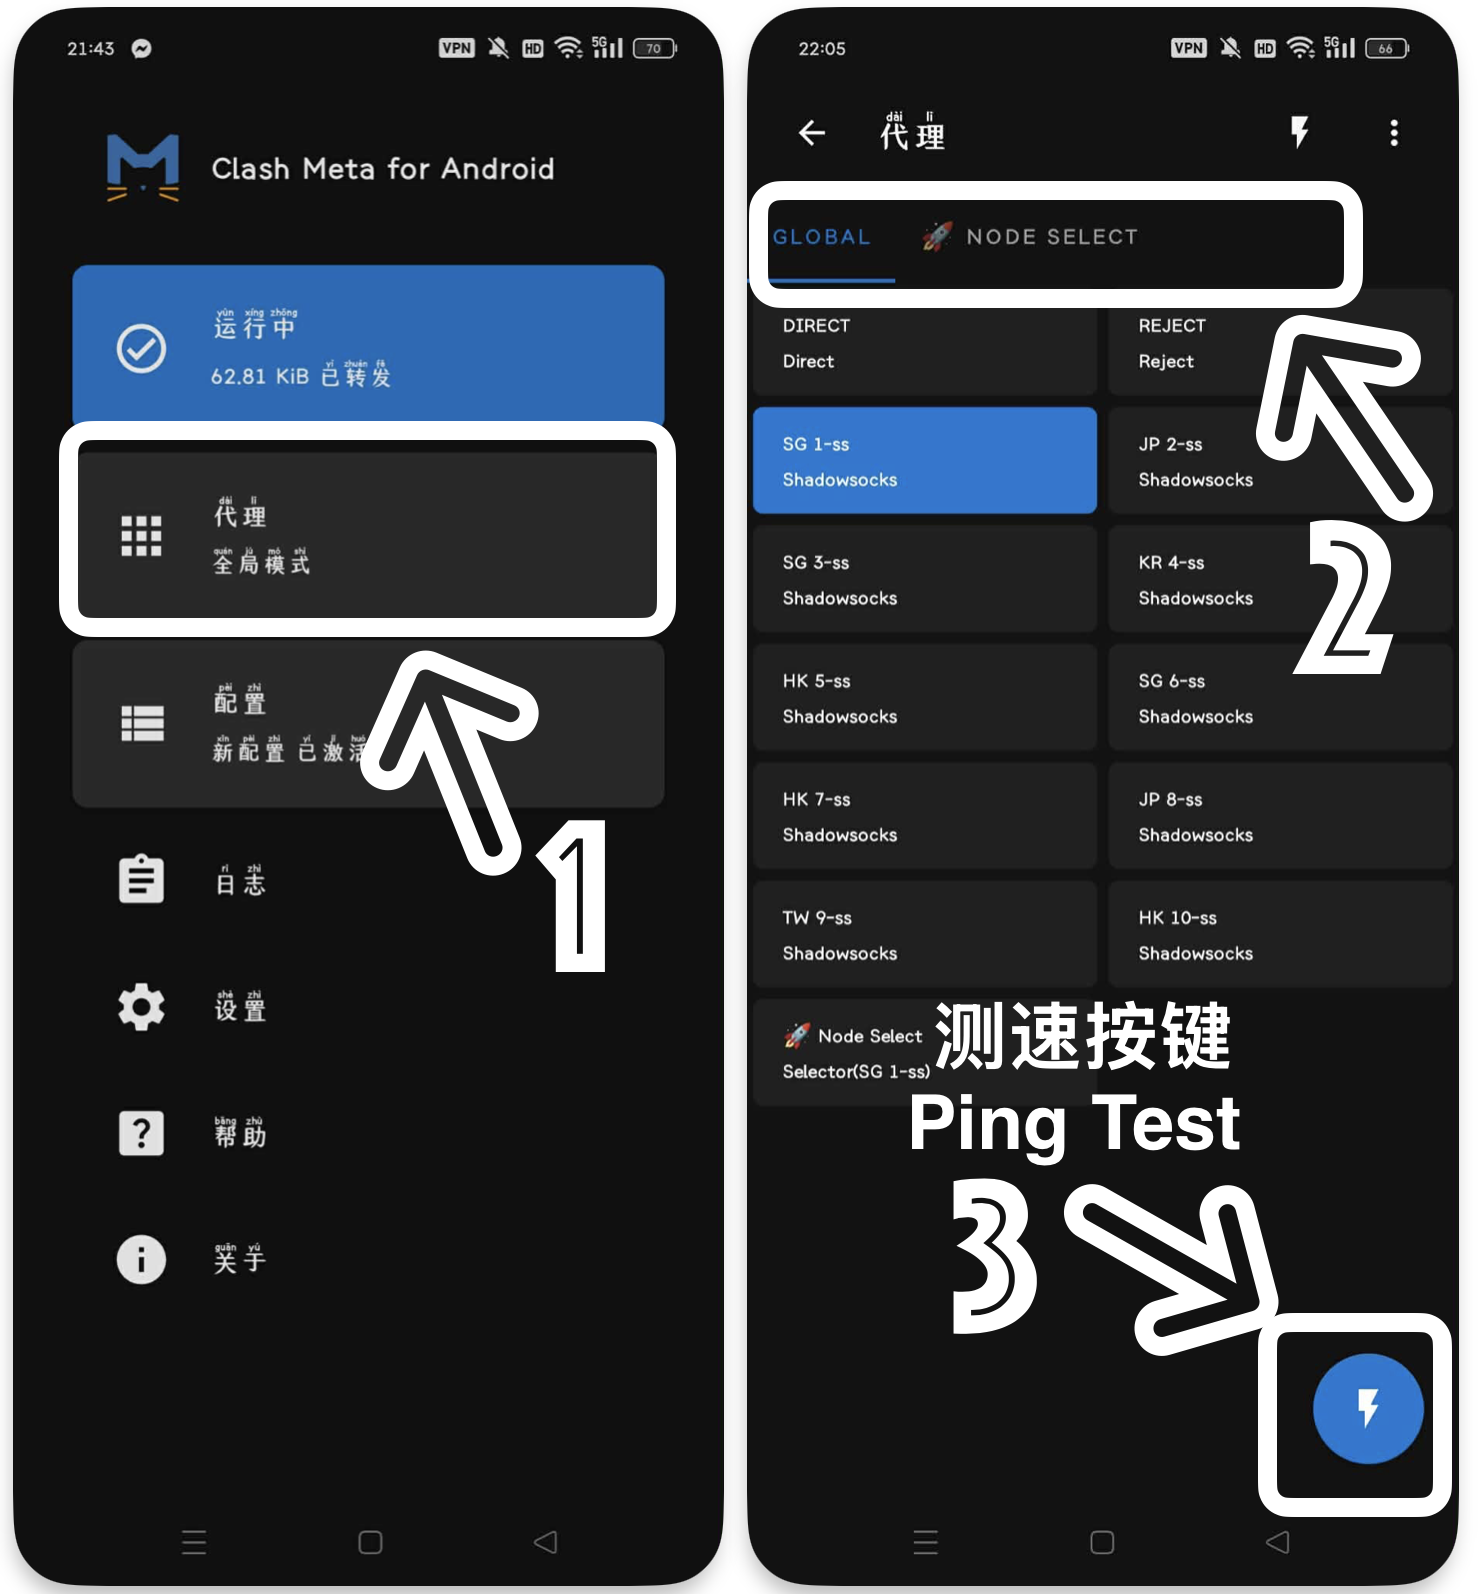
- Click Proxies.
- Select a group, click the node in it, and return to the main interface.
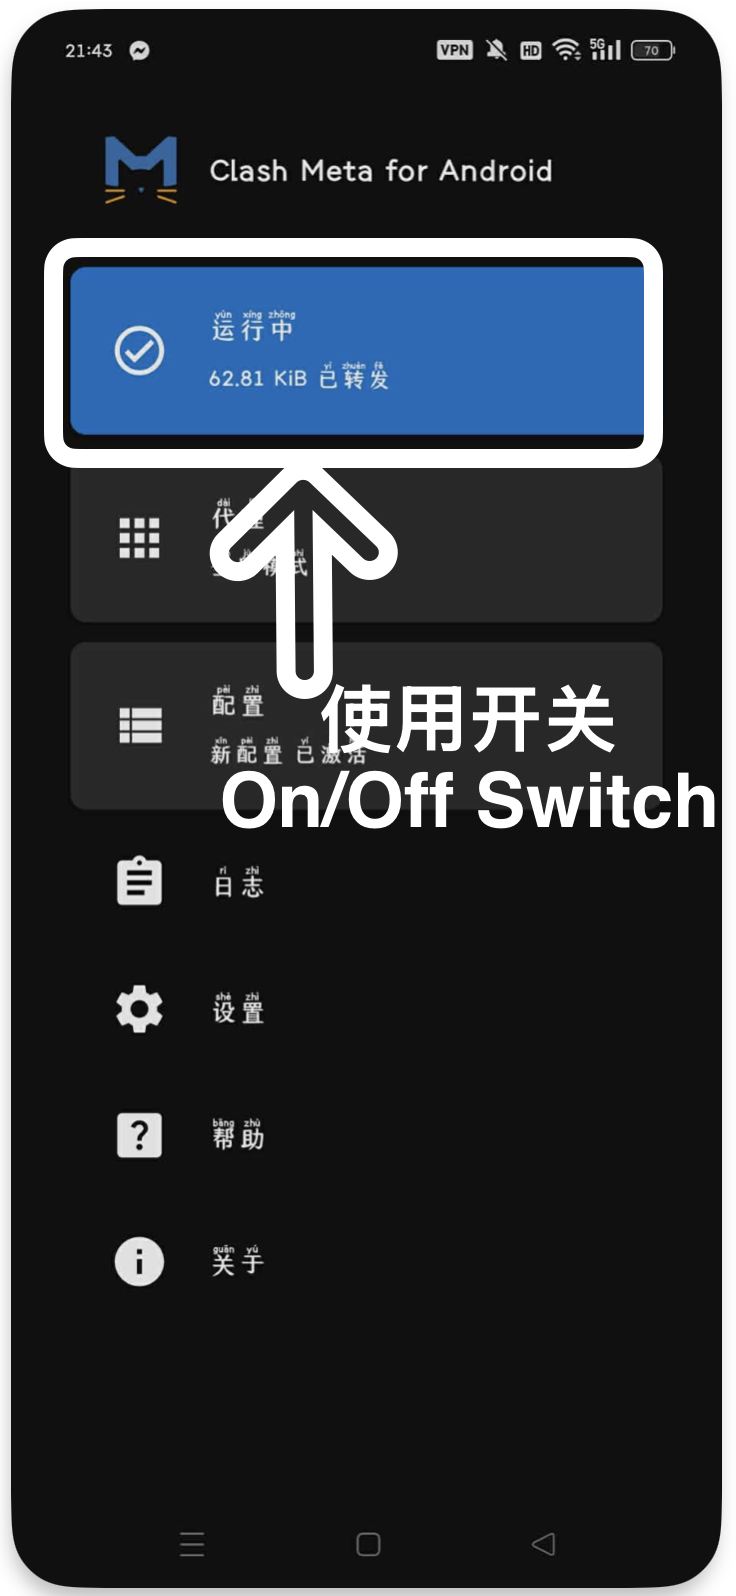
Step 4: Start Service
- On the main interface, click the Stopped button to make it Running.
- The phone system will ask for VPN permissions. Click OK.
Other: Speed Test
- Click Proxies to enter the proxy list.
- Select all nodes or individual groups.
- Click the ⚡️ icon in the bottom right corner to test the speed.
Important
If there are other VPN apps running, please close them before starting Clash Meta for Android.