Android v2rayNG Guide
v2rayNG is the most popular, universal V2ray client on the Android platform. It supports VLESS, VMess, Shadowsocks, and Trojan protocols.
Step 1: Download v2rayNG
Recommendation: v2rayNG_1.9.9 Version: Download from MediaFire | Download from Pcloud | Original Source
- Open this tutorial using a browser, click the download above.
- It can be viewed in the browser's download list.
- Click install.
Step 2: Install v2rayNG
- If installing via APK, ensure "Install from Unknown Sources" is enabled in Android settings.
- Open the application.
Step 3: Add Subscription
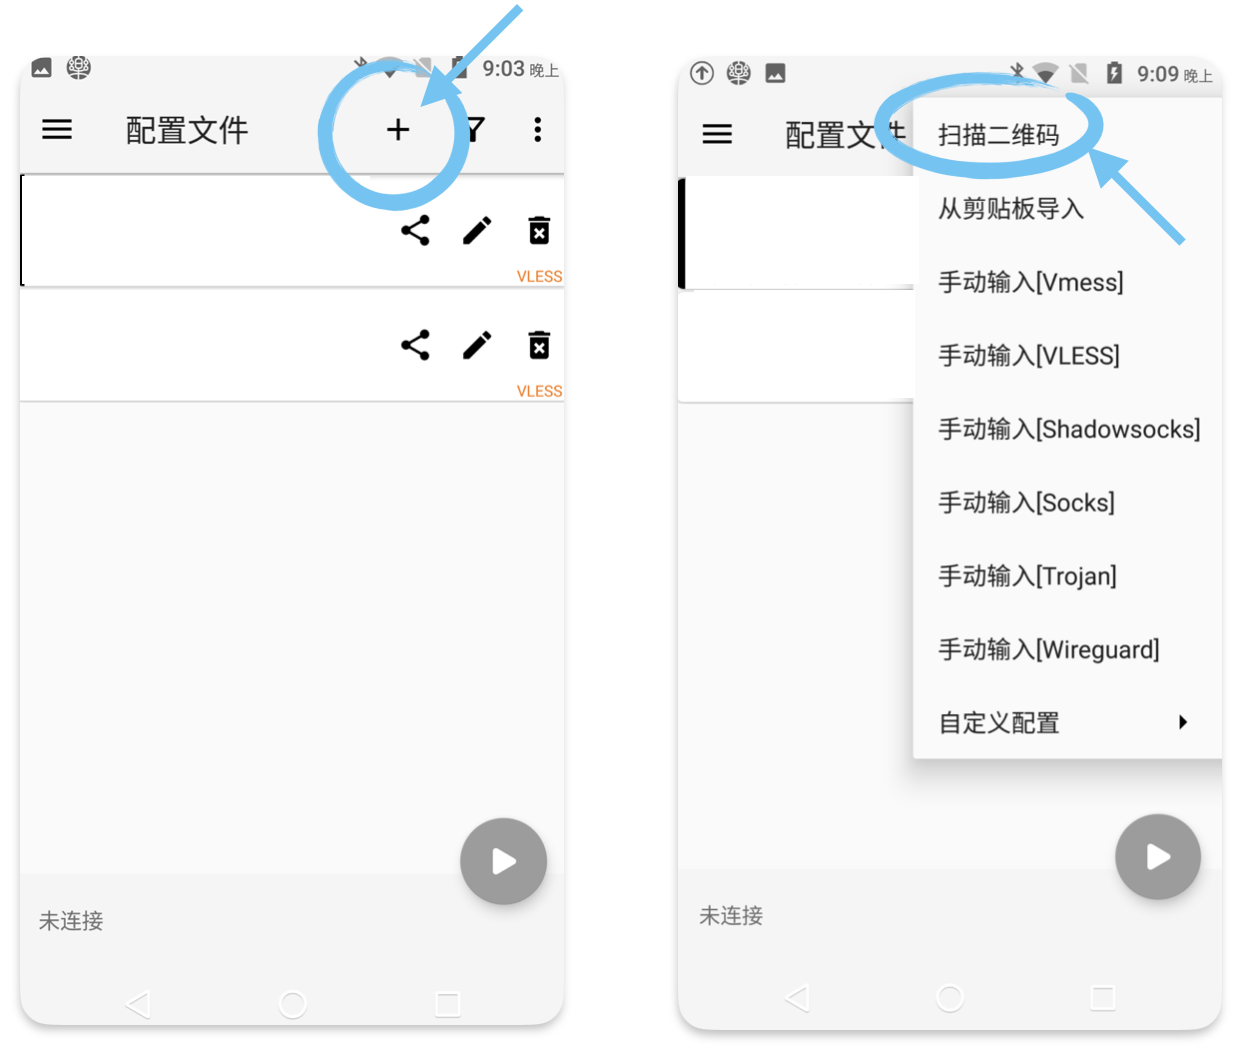
Method 1: Add by Scanning QR Code
- Click the + icon.
- Click Scan QR code.
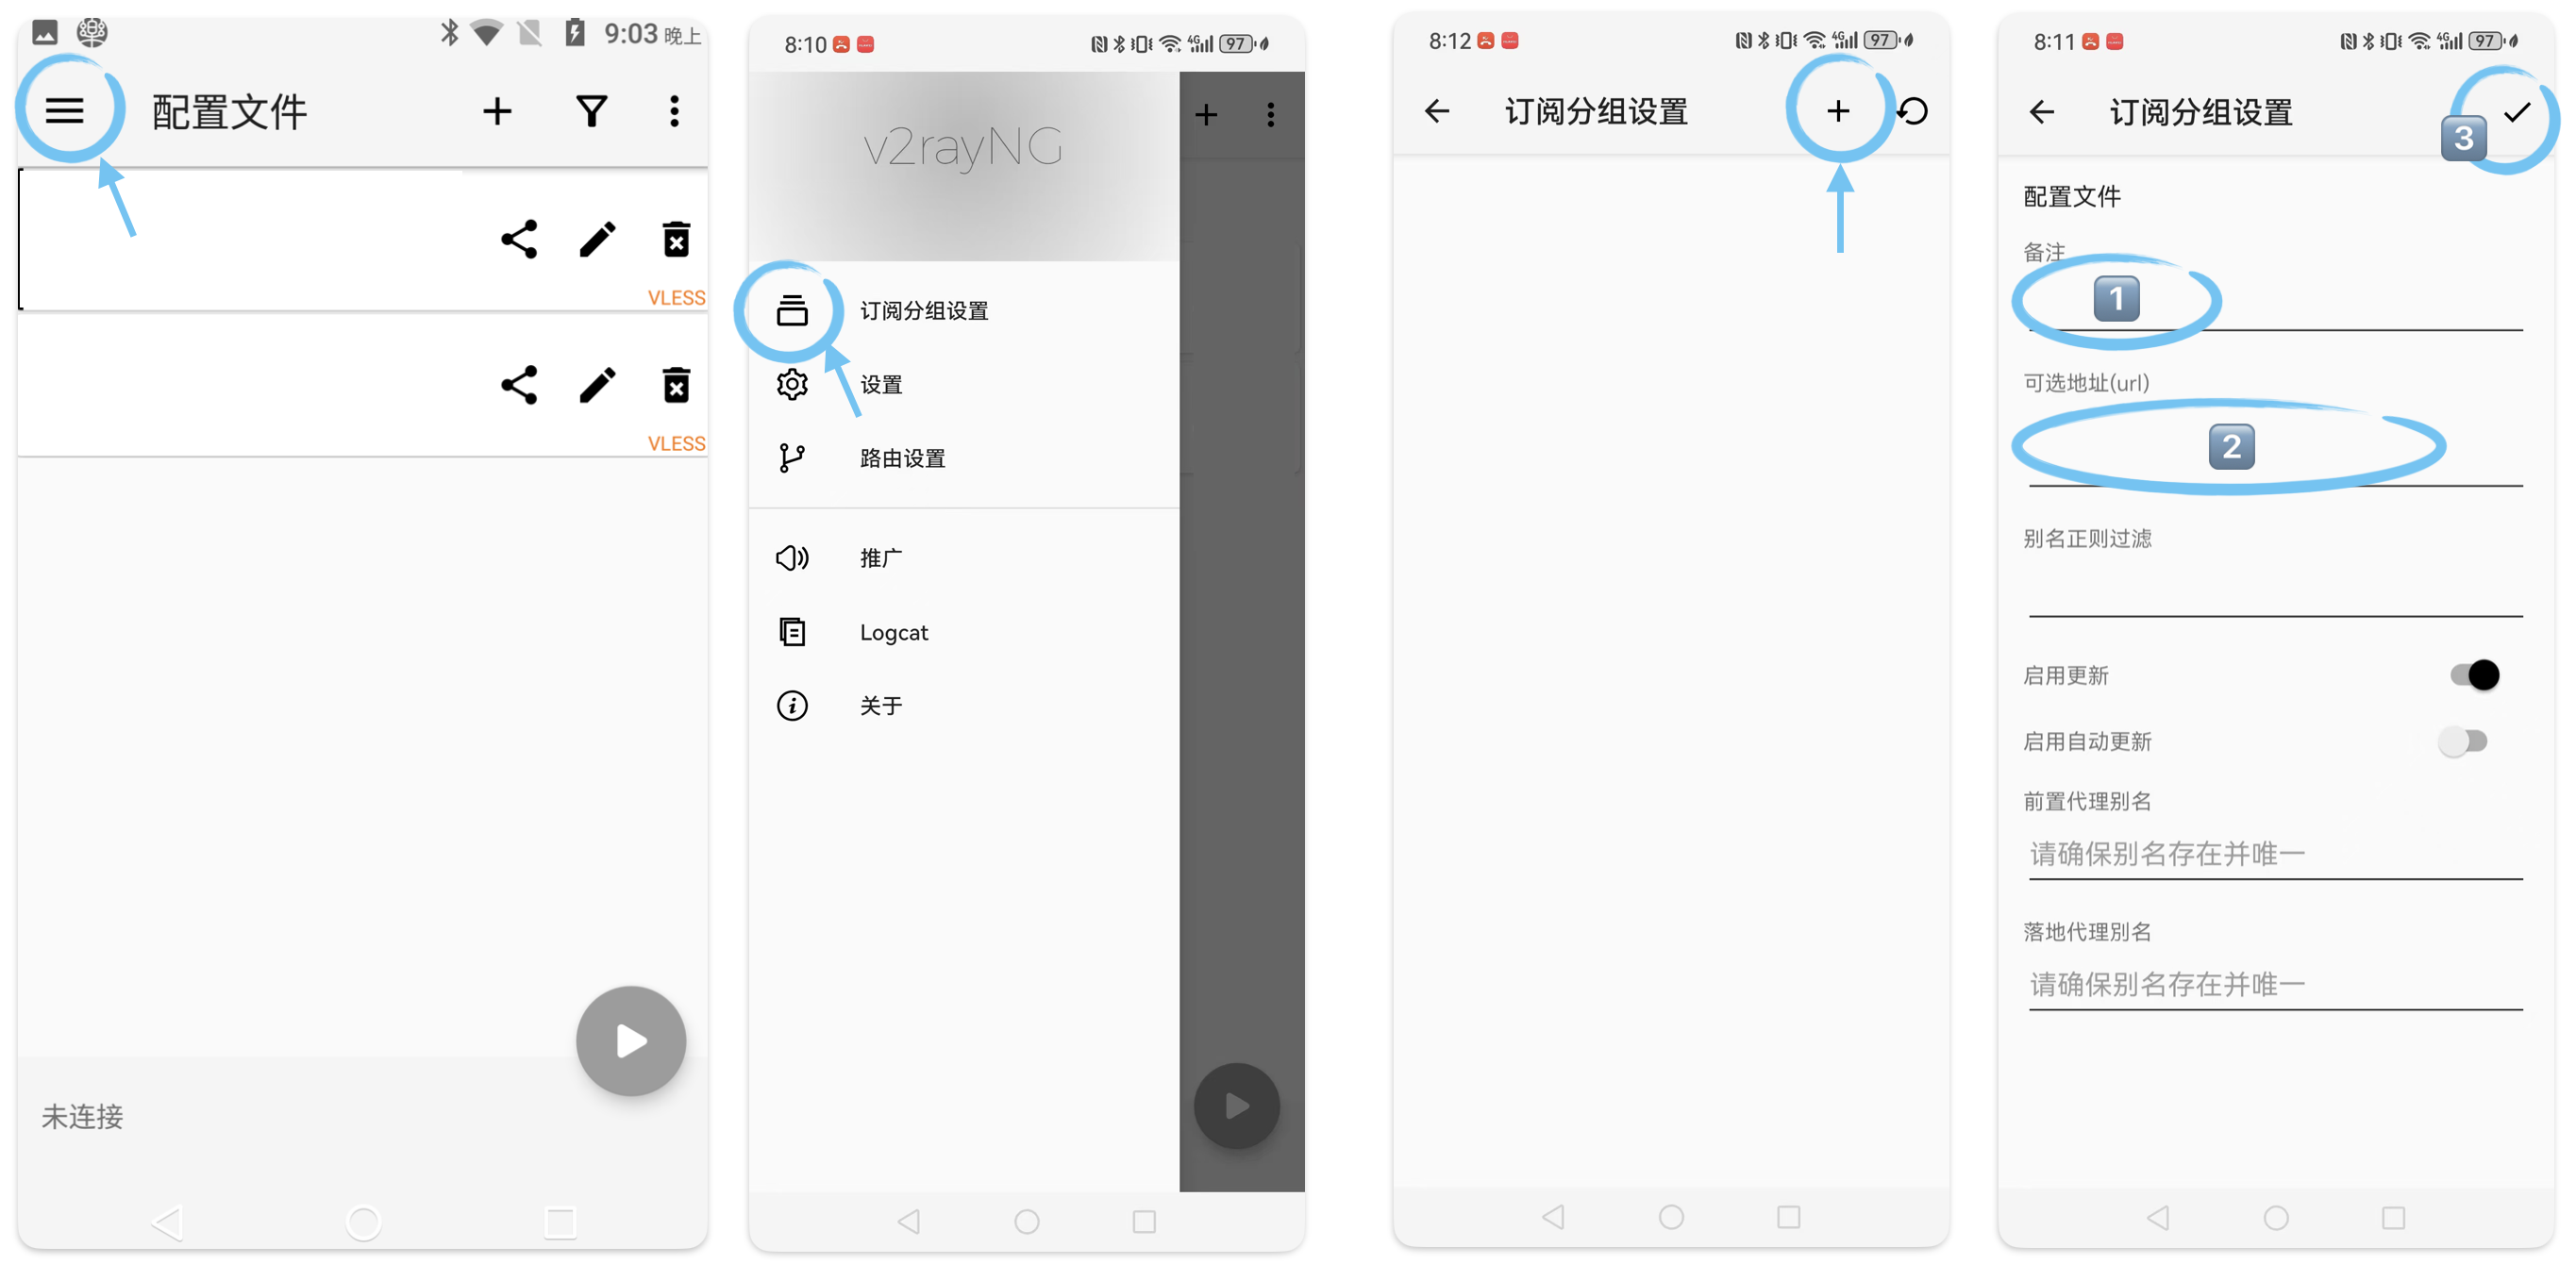
Method 2: Manually Add Subscription
- Copy your subscription URL.
- Open the side menu of v2rayNG and select Subscription group setting.
- Click the + icon, enter a name, and paste your URL.
- Click the checkmark icon to save.
Step 4: Update Servers
- Return to the main interface.
- Click the three-dot icon in the top right corner and select Update subscription.
- The server list will now display.
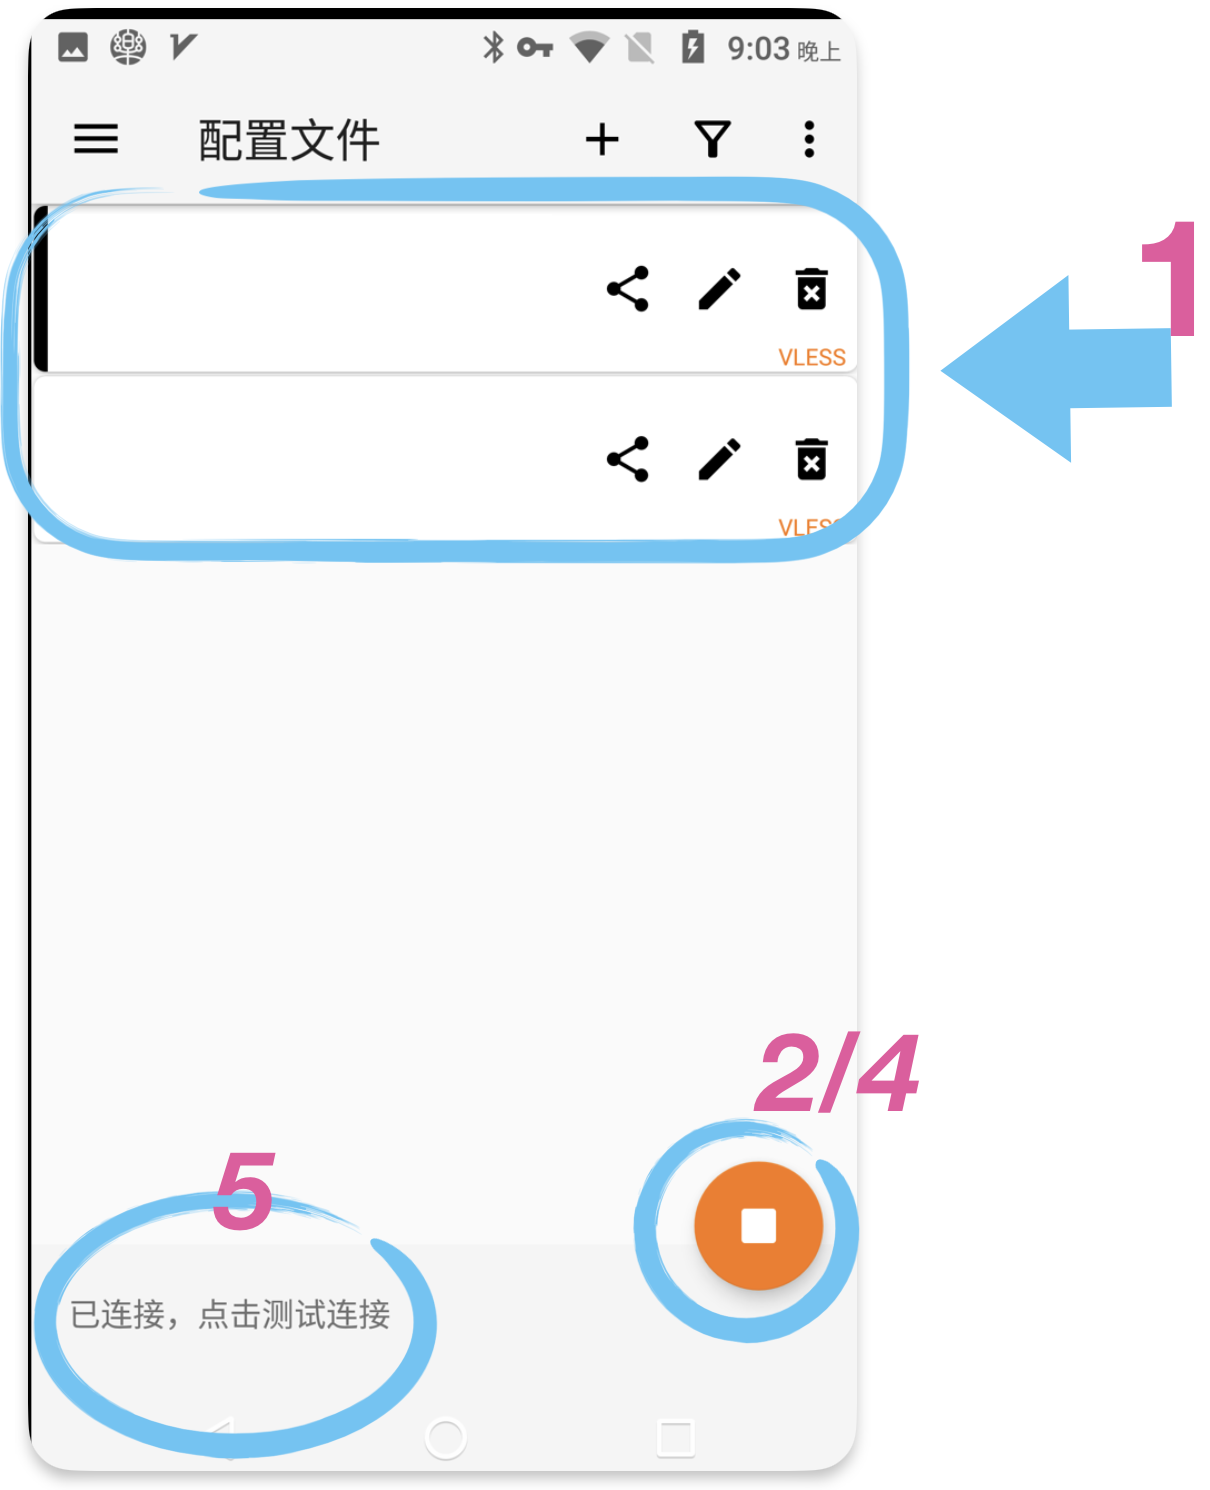
Step 5: Connect
- Select a server from the list.
- Click the ▶️ circular icon in the bottom right corner to turn on the proxy.
- Grant VPN permissions when prompted by Android.
- After connecting successfully, the icon will turn into ▫️.
- After connecting, click "Connected, tap to check connection" to test the connection.
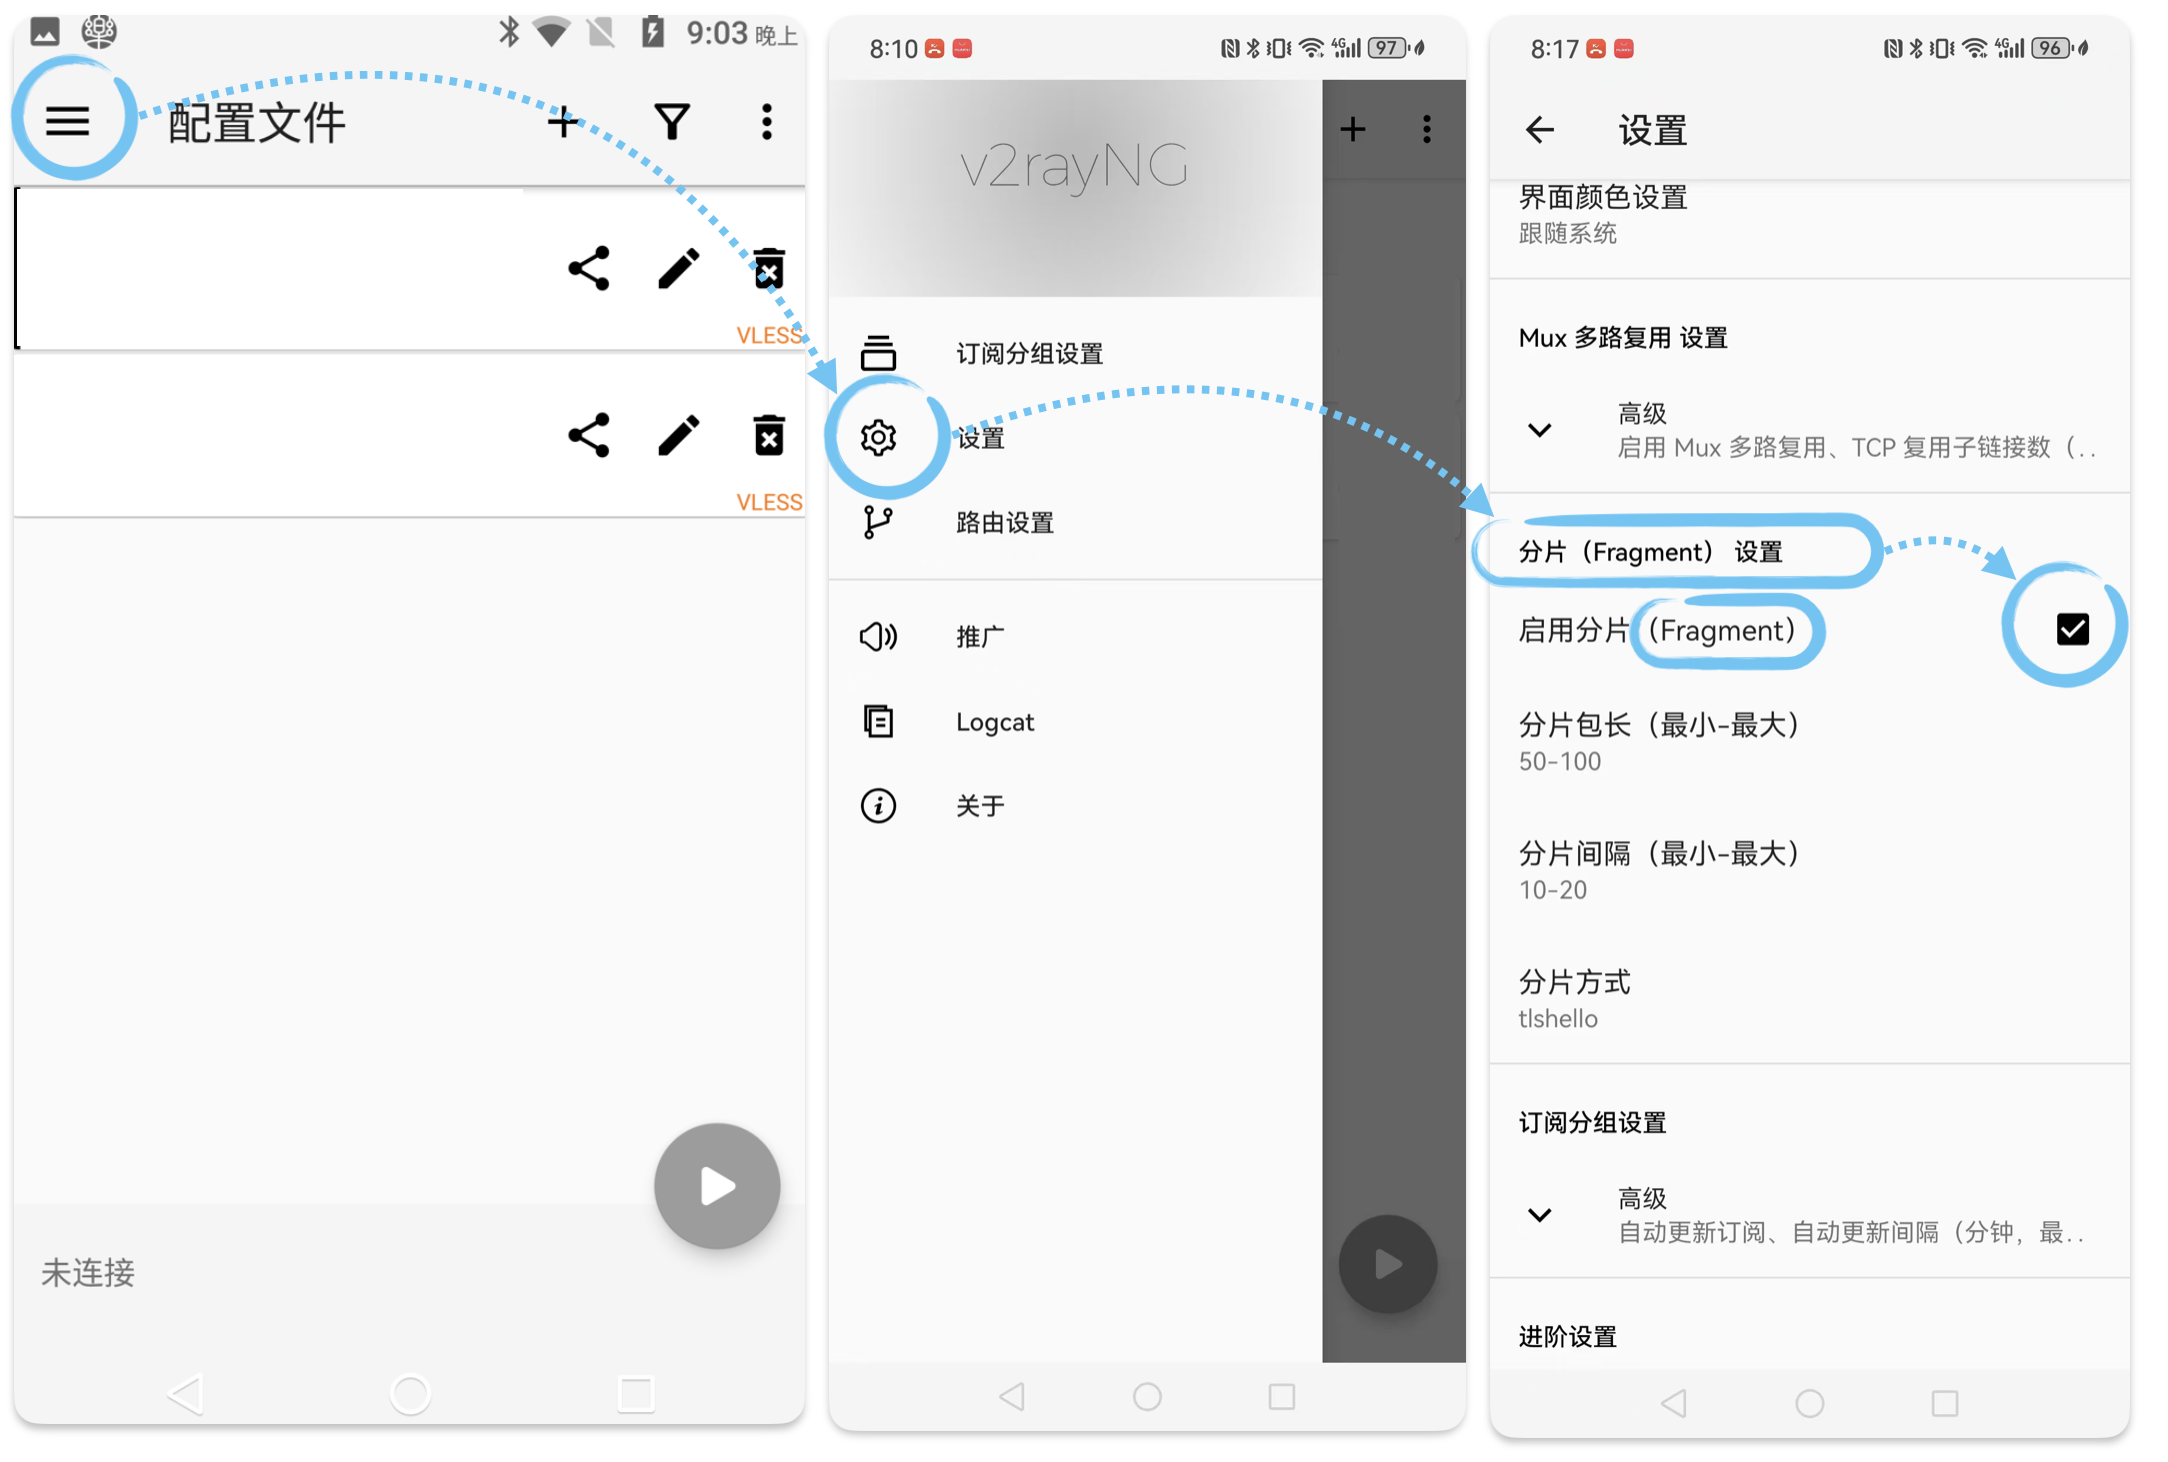
Other: Enable Fragment Feature
- Open the side menu of v2rayNG and select Settings.
- Scroll down the panel, find and click Fragment setting.
- Check Enable Fragment.
Other: Set DNS
- Open the side menu of v2rayNG and select Settings.
- Find and click VPN DNS (IPv4/v6 only).
- Set it to [8.8.8.8] and click OK.
Tip
You can use the Real delay test in the menu to find the fastest server in the current network.